

I finally finished my cape!
When I wrote a post about different types of capes last October, I was already working on this one. I had to put it aside for awhile, and then it sat and sat, decorating my dress form. All it lacked was buttons.
But let's back up a bit.
This is a downloadable pattern from Tessuti. It comes only in one size. I didn't muslin this pattern, but I did tissue fit the paper pattern. I was with Georgene at the time, and she recommended a rather novel approach to the FBA. She suggested that I raise the shoulder seam on the front only, as shown in the following pic:

It's a rather unconventional approach, but Georgene got the idea by reading the wrinkles on the paper pattern as I was modeling it, and it gave me more room in the front. I didn't make any other changes to the pattern.
Georgene also suggested that I make the cape to be reversible.
I liked her suggestion but, grumble grumble, it meant more work for me, and more fabric to acquire. The main fabric is an incredibly soft wool knit from Emma One Sock. The other side is a charcoal-colored, water repellant fabric from Fabrics R Us, purchased the same day I went to PIQF.

The pattern has no pockets, but I wanted pockets on each side, so I spent time dithering over what sort of pockets to use. Have you noticed that these sorts of details require much cogitation? At least they do for me.
For the wool side, I made zipper pockets.

For the solid side I made patch pockets with a "window" opening. (I think I first saw this pocket on Pinterest long ago.)


This cape is mostly "open", like a poncho, but a button at each side creates some shaping, as shown in the following technical drawing:
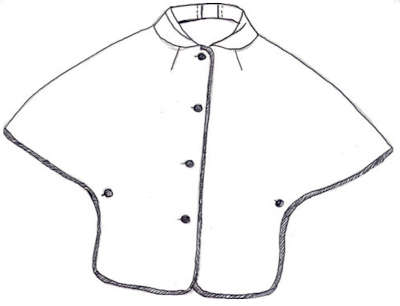

Since I wanted the cape to be reversible, I had to get creative. I decided to put a buttonhole on the front and the back at each side seam. I then created button "cuff links" to go through the buttonholes on each side. Since this fabric has some loft, I used a piece of foam, with a slit cut out, to sew the button cuff links so that there would be about 1/4" of thread between them:

I purchased the buttons at Britex.

The buttons at CF are sewn on normally. This means that when I wear the cape with the waterproof side out, the left side buttons over the right. C'est la vie.
The cape is finished with a beautiful wrap-around binding that I purchased at Britex. I sewed it on by hand—it took me two days to complete.
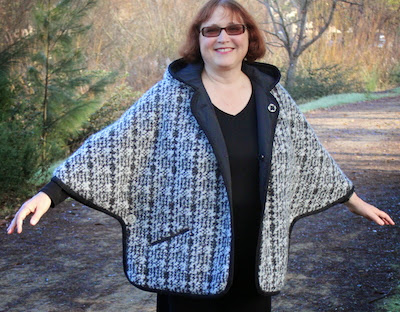


Thanks to mem for these pics!
