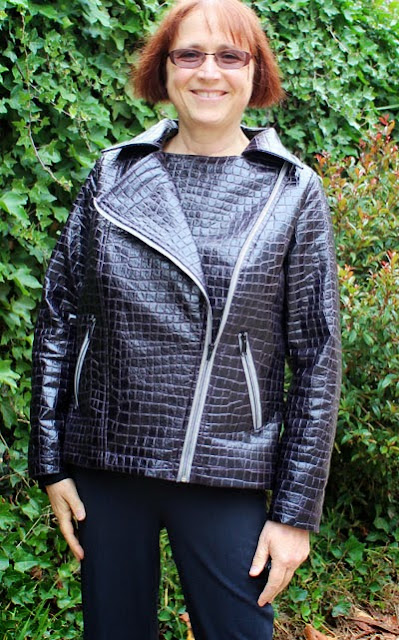
I bought this eggplant-colored crocodile-embossed pleather over a year ago. (It looks black in some photos, but it is eggplant.) Originally I was planning to use it for a bag. But more recently I found myself wanting a moto jacket. In fact, I found myself wanting to make a moto jacket similar to Margy's. In the end, my jacket ended up being almost identical to Margy's. Before I made my jacket, I asked her if she minded and she graciously said that she did not.
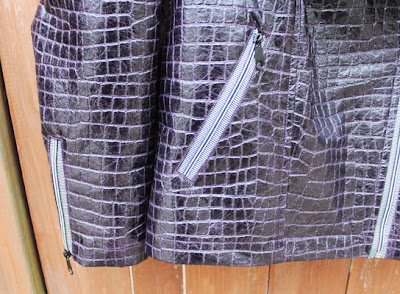
Because my fabric was eggplant colored, the zipper choice proved to be a bit challenging. I looked for eggplant-colored zippers and could not find anything I liked - the closest I could find were purple. I didn't care for the look of solid black zippers with the fabric, so I tried a striped zipper and it worked, making my jacket even more like Margy's.
I found this fabric to be pretty easy to sew. It is a PVC fabric, but it is backed with a knit backing and it is not one of the "sticky" faux leathers. Even so, I used my Teflon foot, Teflon zipper foot, and a microtex needle.

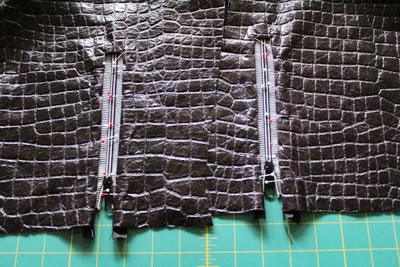
I topstitched using a Guterman topstitching thread in an eggplant color. I marked things (such as the pocket location) with scotch tape, and avoided putting pins through the PVC, except in the seam allowances. In places where it couldn't be avoided, such as when I positioned the zippers, I pinned into the "cracks" of the faux crocodile (as shown in the picture above with the zippers pinned in place), which really didn't create visible holes.
I used scraps of solid black Ambiance Bemberg lining for the pockets and the gusset behind the sleeve zippers. The jacket pattern is not lined, but I created a lining pattern. I used a black fabric with lavender and purple polka dots. It's a fairly thick taffeta-like fabric, much thicker than your typical lining fabric, but it worked.


Other alterations and modifications:
- I made a size Medium. This measures 43" at the finished bust, which was enough width, but I still needed a vertical full bust adjustment. This is a princess seam design and, for a while, I was not sure how to do a vertical FBA without adding width. Then I woke up one morning with a flash of intuition on how do to this and it worked! I added 1-1/4" vertically for the bust.
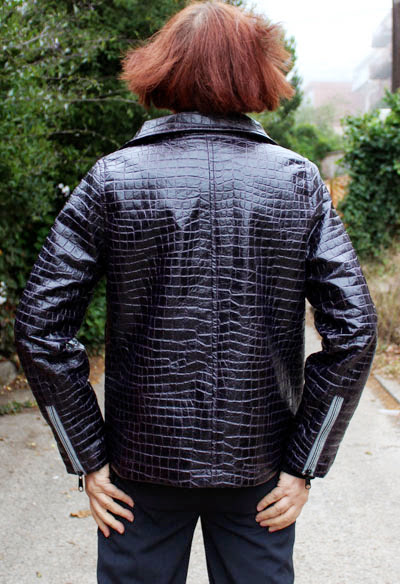
- I made view B, but I wanted the zipper pockets and zippered sleeves from view A. The pockets were very high, so I lowered them by 3". Since the view A jacket is shorter, it makes sense for the pockets to be located up higher.
- Because I wanted to showcase the striped zippers, I made the zipper "windows" much wider than the pattern intended. The windows for the pockets and sleeves were 3/4" wide.
- I narrowed the shoulder by 1-1/8".
- I did not shorten the sleeve, which is pretty unusual for me.
- I am not a huge fan of bagged linings, so I sewed the lining in by hand, which took two long evenings. I really prefer the result, though one of these days maybe I'll give a bagged lining another try.
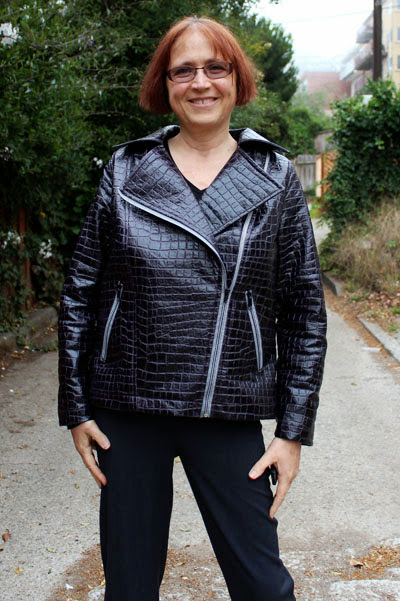
This is a beautifully drafted pattern. It is OOP, but worth tracking down. I definitely plan to make another one or three. I am feeling moto jacket love. If you look at RTW, you will see moto jackets everywhere!
Thanks for your comments on my Barb pants! I wore them all day today (and am wearing them in these pics) and they were sooooo comfy. I went shopping with DD2 and also wore my new jacket. This color is really growing on me. :)