Sunday, May 27, 2012

Shams Sewing Tip #231


Trippens, Trippens, who's got the Trippens?

It might startle you to know that I am not the epic house cleaner. If you know me well, you might consider this an amusing understatement. But I want to share a sewing tip that is, as far as I know, unique to me.

What do you do with those scraps that are too small to use? I hope you do not put them in a box, neatly labeled, "Scraps too Small to Use".

What I do is to take a handful of them and, before heading to the trash, I seek out dust bunnies. I swipe floor boards, corners, wherever dust collects. The following example is from underneath the piano and behind the coffee table.


This cotton shirting is from my current sewing project. Stay tuned for the finished top.

You're welcome!

ReAnn and Jillian Meetup


Match the Trippen to the Sewist!

On another note, ReAnn was in town towards the end of last week. She, Jillian and I got together for a long lunch and a quick run to Fabrix. I wish I'd had more time to play, but I am seriously lacking vacation hours at the moment. In fact, my lack of vacation hours caused me to cancel attending the Haute Couture event in Chicago earlier this month.

Our visit was short, but a lot of fun. We all decided to sport Trippens, our favorite collective shoe brand. (Though we are Trippen amateurs and bow to Margy, the Trippen Goddess.) As we walked the half block from Fabrix to the restaurant, a group of people (3 women and 3 men) stopped us to admire and ask about our shoes.

Trippens bring people together! :)

Thursday, May 24, 2012

The L Flounce


I actually made this top last March at the sewing retreat. I didn't quite like how it turned out, so it was tossed into a corner. This week, I decided to try it on again and, low and behold, while not perfect, it had improved with age.

This uses my TNT t-shirt pattern (one of the Style Arc tops - I can't remember which one) with a couple variations: the Chico Twist neckline from "Nifty Necklines for Knit Tops", and an asymmetric flounce at the hem that I call the "L Flounce". The fabric is a yummy rayon lycra knit from Fabrix.

I was perusing a RTW website some months ago and noticed this flounce on one of the tops. I realized, from studying the picture, that the flounce was a very simple L-shape. (I love it when that happens!)

What is so Special about the L Shape?

Up until now, similar patterns I have seen place the draping at the hip. I have made several patterns like this and I do like that look. But the L shaping places the drape over the leg, not at the hip. This does not add any bulk to the hip and creates a flattering line for virtually anyone.


This diagram shows how the flounce is drafted. The "inside" edge of the L, or the length of A + B, is equal to the width of the front (or back) hem. For my top, I made the length of A to be about 1/3rd of the width of the front hem, and B was the remaining 2/3rds. This placed the long "point" of the hem 1/3rd of the way in from the side seam, as the "point" hangs directly below the inside corner. I made the length of the flounce 10", but you can use whatever length you prefer.

You cut two of the flounce shapes - one for the front and one for the back. (Though, if you don't want a "point" on the back, you can cut a simple rectangle that is A+B wide and 10" long.)

When the fabric is cut with right sides (or wrong sides) together, both the front and back will have the points on the same side of the body. When the fabric is cut with right-side-to-wrong side (so that both layers of the fabric are facing the same direction), the front and back points will be on opposite sides of the body.

In the diagram, the edges marked as 10" are the side seams. To construct, sew the side seams, wrong sides together. Sew the flounce to the hem of the top using a 1/4" or 3/8" seam allowance. Sew straight across the inside corners, which is quite easy to do in a stretchy knit. In a woven, stay stitch the inside corners at the seam line and clip to the stitching before attaching the flounce to the garment.

You can use this L Flounce on any top, loose or not so loose — just vary the lengths of A and B appropriately. I did not hem my flounce, but you certainly could, though I would recommend using Steam a Seam Lite 2, if you do.

For my top, I started with my TNT t-shirt and cut it shorter, to allow for the length of the flounce. I also cut the neck wider for the twist neckline. If I use this neckline again, I will not make the neck quite so open.


The Chico Twist neckline, from "Nifty Necklines for Knit Tops". The neckline is a bit too wide.


My first attempt at the Chico twist neckline. For this top, the neckline was too high. Next time I will get it juuuust right!

Wednesday, May 23, 2012

A New Tote Bag and Maker Faire


Side 1


Side 2

If you recollect, I reported on a FabMo tote bag class I took a couple weeks ago. In class we made a small tote bag, a perfect size for a sewing caddy or a lunch tote. But our packet included measurements and instructions for a large sized tote.

So, last Sunday, looking for a fun creative outlet, I rummaged through my FabMo fabrics looking for larger pieces. This tote is more involved than the smaller one, because it has 6 pockets: one zippered inside pocket, two inside patch pockets, and three outside pockets: one on each side, with a credit-card sized pocket peeking out from one of the larger pockets.

It ended up being a one day project.


One of the lining pieces with a contrasting patch pocket. Notice the lower right corner? That's an oops. I was supposed to cut away a 3" square to create the bottom, but I cut away a 4" square. To fix it, I pieced in another square and then cut the proper amount away.


The other lining piece. This one has a contrasting patch pocket below a zippered pocket. Notice that this one has the same oops? I had layered the two pieces together when cutting out the too-large square.


The backside of the above lining piece, showing the bag for the zippered pocket.


Alongside the smaller tote, for comparison.

Maker Faire 2012


The FabMo booth, before the event opened and the crowds descended.

And speaking of FabMo, last Saturday I volunteered to work in the FabMo booth at Maker Faire. I had been meaning to get over to Maker Faire for years but never quite managed it, so this was a good excuse. After my Saturday morning shift, I didn't have much time to see the rest of the fair, but I managed to see a bit of it before I had to leave for another event.

Maker Faire is an interesting event - it's a bit like "Burning Man Lite". It includes a Steampunk contingent. (I saw a couple who had just married in a Steampunk-themed ceremony, riding a Steampunk carriage around the grounds.)


Decorations on one of the booths selling Steampunk jewelry.


I didn't hang around long enough to understand what was going on here, but this exhibit was playing music.

There is a darkened building filled with light shows and laser booths. There are areas to play with legos, electronics, computers. There are funky vehicles to ride. There are robots including at least one Dalek. There are people sporting interesting and bizarre costumes.


This metal dragon is capable of breathing fire.

There is an area with people knitting and making jewelry and doing Tapigami. Tapigami is kind of like origami, but with masking tape.


The Tapigami display


Closeup

In one building there are crafts activities, such as the FabMo booth. And there is food — lots and lots of food.


The beignet booth was right near the FabMo booth.

Will I go next year? I'm not sure. But it was interesting.

The Mammoth Dart


It's interesting that I often get questions from folks who sew for the uber busty more than I get questions from the uber busty. I guess the uber busty learn to deal with it, and move on. :)

I recently received a question from an expert sewist who was sewing for her uber busty daughter and struggling with the mammoth dart. I'm not talking about those darts where the legs are maybe half an inch apart. I'm talking about darts where the legs are 2" or 3" apart. This sewist was asking me how to sew such a dart so that you don't get a "point" at the end of it.

I hate that point. Hate hate hate. And I don't know about you, but my uber bust lacks sharp points, so a dart that ends in a point is to be avoided at all costs.

There are several ways to deal with a large dart. All are valid and you can play around to find the approach you like best for your particular project.

  • Convert the mammoth dart to a seam, for example a princess seam. A princess seam goes through the bust point. It can go from the bottom seam/hem to the armscye, from the bottom seam/hem to the shoulder (I recollect this is called a military princess seam), from the side seam to the armscye, and so on. This is really not that hard to do, but I won't cover the "how to" in this post. (I googled and found a Burdastyle pictorial, Change darts to Princess seams, showing how to do this with a sloper, but the approach is the same for a garment.)
  • Convert the single mammoth dart to two or three smaller darts. This is also quite easy to do using slice and slide. (There might be a better term for this, but it is descriptive of how I do it.) For example, convert the large dart to one that goes to the side seam and another that goes to the armscye. Or maybe put two darts at the side seam, but one heads towards the hem, in what is called a French Dart, and the other ends higher up, maybe towards the waist. Note that angled darts create a more flattering line than a strictly horizontal dart.
  • Use some shaping when sewing and pressing the dart. This may not always work to your satisfaction, but is most successful when you are using a print or a textured fabric that will help camouflage the dart.

For this post I want to talk about the third approach. There are several aspects to sewing a dart, which is a big reason I sew my darts at the end of constructing a garment. I pin the darts right on my body. That is not always possible, for example if you are sewing for someone who is not geographically available, but it really works the best.

First, you must consider the length of the dart, and this relates to the shape of the bust. A full, rounded bust, like mine, requires a shorter dart. A less rounded bust (does anyone with an uber bust really have a cone shaped breast?) requires a longer dart. But never do you want to sew the dart all the way to the bust point, at the fullest part of the bust. It should end before that point. In my case, maybe 2 or more inches before. In the less busty, maybe an inch before.

Secondly, I don't sew the bust dart in a straight line, though it is always drafted with a straight line on the pattern. Again, if the breast has a more conical shape, this is fine. But for me, a gently concave (or is it convex?) curve works best. Again, if you can pin it on the body, it's easy to achieve the correct shape.

Next, and possibly most importantly, as you are sewing the dart, start from the legs and sew towards the point. However, as you near the point, approach it gently. Ease into it. Think of a beach where you can easily walk far into the water, rather than one that drops off sharply. It's almost impossible to accomplish this if you start sewing from the point.

Finally, press the finished dart flat (do not press all the way to the point or you will create a crease) and then press the garment opened flat, over a ham. This is an important step, so if you do not own a pressing ham, treat yourself and get one from Stitch Nerd (scroll down in the post). Note that her regular ham is on the smallish size. For the uber busty, you might want her larger sized ham.

Lay the garment opened flat, so that the dart drapes over the gently curved ham and the fullness of the dart is folded down, towards the hem. Cover with a press cloth, if needed, and press, with lots of steam. You want to squash that "point" flat and encourage it to be a curve. This works better in some fabrics than others; wool, for example, is very malleable.

Despite all of this, sometimes a dart just doesn't behave as well as you'd like. When this happens, it's best to take a philosophical approach. The garment will still fit better than anything you've purchased. ;)

By the way, thanks for all your feedback on my muslin post yesterday. I really do appreciate your perspectives and input! We are having a gloriously sunny day today, so at some point I will take photos of my latest project, which is not a wearable item.

Tuesday, May 22, 2012

Jacket Muslin Fail


Margy's fabulous Dotty jacket

This is a story of failure, or an almost failure. My failure, not Margy's.

Have you seen Margy's fabulous polka dot jacket, which she calls Dotty? It's awesome, right?

Actually, I have the same fabric. I purchased it from Gorgeous Fabrics, right after Margy received hers and pronounced it droolworthy. It's a really nice textured polka dot brocade - Margy has a knack for finding such treasures.

We decided to do a little challenge. An uncomplicated challenge where we would both sew up the same fabric. Margy knew right away which pattern she wanted to use. We gave ourselves a deadline of the end of May.

This challenge sounds easy, but for me, not so much. I can really angst over choosing a pattern, and this was no exception. I have lots of jacket patterns, and narrowed it down to a small pile, but didn't want to choose the final pattern until the fabric arrived and I could grope it firsthand. It's a lovely fabric and had more drape than I expected, for a woven brocade.

I decided to make New Look 6855. I like the princess seams, which end in a raglan seam. I also thought the notch in the neckline at center front was cool. A very nice design and now OOP.


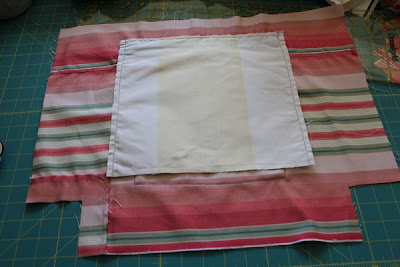
I grabbed some ugly fabrics out of my "muslin worthy" fabric basket. (That basket is starting to get woefully empty.) I started with the short version of the jacket in my usual size - 18 - and did the minimal pattern alterations: a hefty FBA and removing some (but not all) of the hip shaping due to my straight hips. I knew I'd have more altering to do, but this is a good starting point. I quickly sewed it up and, the next morning, ran out at 6pm in the fog to take a couple quick pictures, because I was sharing them with Margy.


No, I don't iron my muslin fabrics. ;)


Oh, DEAR, you are probably thinking. I can't disagree. However, I want to point out that this is typical of my experience with Big 4 patterns. The shoulders are too wide by a couple of inches. Despite my hefty FBA, I still need more bust room. The sleeves are too long, and the hips are still too big. The back is too narrow. The raglan seams in back pouf out in a funny way when my arms are down. Even more disappointingly, I didn't really like the neckline as much as I thought I would. I decided that I just didn't like this result enough to keep going down this path.

(By the way, should I mention that when I mailed Margy these photos that early morn, that I bcc'd myself, or so I thought. I actually sent them to the head of the dance department at my daughter's university. She has a similar login to my work login — auto-completion bites again. It figures I'd sent her these pictures instead of more flattering photos!)

Back to the drawing board. I have been wanting to make up the Style Arc Coco jacket.


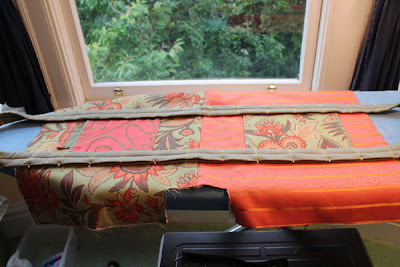
I thought it might work nicely for this fabric, but I wanted to make some changes. I started with my usual size - 18 - and eliminated the bottom band, did a hefty FBA and removed some of the hip shaping. Pretty much the exact same alterations as I did for the New Look pattern. I grabbed another piece of fabric from the "muslin worthy" basket (getting even emptier) and sewed this one up.


Interesting, yes?

I usually avoid horizontal lines on or near the bust, but I knew I could eliminate that horizontal seam by extending the princess seam to the shoulder. But I think you can see why horizontal seams in that area aren't so great for my uber bust. This pattern fits better, from the start, than the New Look. The sleeves are a good length. The shoulders are too wide, but only by about 3/4". I need to tweak the fit at the hips, and at the front princess seam (very normal for me after a large FBA), and take in a bit at the waist so that it is less boxy. I need to widen the back (again, quite normal). The alterations are not that different than the alterations for the New Look, but it will be less work than fussing with those raglan seams in back.

But I decided I didn't want to use this pattern for the polka dot fabric, either. Margy was on vacation, but had her jacket shell completely constructed and I didn't even have a pattern selected. I was starting to feel rushed and a bit frustrated, so we decided to forgo the challenge. When I am feeling more inspired, I will try again. I may go in a completely different direction.

Instead of working on the jacket last weekend, I made something fun. I'll post it when I get some good pictures. We've had days of heavy fog here, typical for a San Francisco summer and not that unusual for a SF spring.

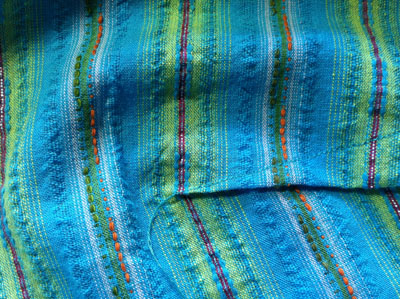
By the way, if you wonder what I am wearing in these pics, those are my PJs. I bought this wonderful African fabric at JoMar's a year ago in April, when I took my fabric road trip with Peggy.

Sunday, May 13, 2012

Happy Mother's Day and Another FabMo Class!


Sue and I with our bags. I think both of us plan to use these as caddy's in our sewing rooms. This size would also make a fabulous lunch tote. Most of the fabrics in the bag are silks.

Yesterday I took another great class from Luanne at FabMo! If you recall, the last class I took was on zippered pouches. This class was to make a tote bag. When you take one of Luanne's classes, you get a multiple-page packet she has prepared that shows you the steps, with color photos. This packet was even bigger than the one for the zippered bag, because it shows two styles and has instructions for different sizes. It's a great resource.


Our messy little sewing corner.

Once again, Luanne had prepackaged fabric packets. She finds that this jump starts the creative process, and you can always swap out any fabrics you don't care for using her bins of FabMo fabrics. I did that straight away, because my packet included a giant floral fabric. It was pretty, a black fabric with large roses, but I am not a floral girl and someone else should enjoy it.


Luanne giving a demonstration

The tote bag is more involved that the zippered pouch, so we really used the entire class time, and then some. Once again, the class was SO.MUCH.FUN. There were 11 students, so it was a full class, jam packed with info. It was pushing it, but Sue and I both got our bags done.


Sue has finished!

Prior to the class, we went to the FabMo distribution, which just happened to be Thursday through Saturday. I was trying to be restrained, and came away with half a bag of fabrics, and some jewelry findings. Once my current schedule settles down a bit, I'd like to make a larger tote, with a longer handle, piecing together some of those great FabMo fabrics.

Though not everyone managed to finish their bags, there were some really lovely combinations in the class!


Side 1.
I fussy cut the fabrics to get the motifs placed where I wanted.


Side 2.
I especially like the pieced, padded wraparound handle and the striped silk binding.


Inside.
I like using two fabrics for the lining. This bag also has a magnetic snap closure, which is optional.

HAPPY MOTHER'S DAY! to those who celebrate. My kids have a full day planned. We are meeting in downtown San Francisco at 10:30am and they told me that we won't be done until 9 or so.

I hope I have the stamina!

Thursday, May 10, 2012

Blogger Meetup - Karen of DidYouMakeThat


See me on the right? In the glasses. (Yes, I just got a haircut.) That's Beth at the very end, in a beautiful purple Donna Karan dress.

I love blogger meetups. I am an extroverted person living an introverted life. I work at home and rarely go into the office, which is about an hour away, or I'd go in more often. I live alone, unless you count my unsociable grey cat, who has never forgiven me for stepping on his tale, in the dark, when he was a kitten. (I never stepped on my white cat...) Even now, he panics if I'm standing up. To top it off, my hobby is SEWING. A solitary hobby, if ever there was one.

So I love to get together with other sewists and I take most every opportunity to do so. My sewing friend and blogger, Beth, of Sunny Gal Studio, emailed me weeks ago to let me know that Karen, of Did You Make That? was coming to the bay area. Karen was going to spend the week studying with Beth and learning couture techniques. Beth is a consummate sewist and teacher.

While here, Karen wanted to meet up with local sewists and Beth asked me for suggestions on where we could meet. As someone who doesn't really drink, eat out, or go out much, I wasn't much help, but Beth found a great wine bar in downtown SF, right at the entrance to China Town, Rouge et Blanc.


I didn't count how many of us showed up last night, but it was maybe 15 sewists. It was SO.MUCH.FUN. I had not been a follower of Karen's blog, which I have remedied. She is a totally delightful person who loves vintage style and wants to master couture techniques. Even though the only person I knew at the event was Beth, I was immediately in deep conversation with many different sewists. One sewist was actually visiting from the U.K. and her trip just happened to coincide with Karen's visit.

I think I'm not the only sewist who loves to get out and interact with other sewists. :)

And, guess what? I don't usually like wine (or most any alcohol). But I had two (rather expensive) glasses of the yummiest French wine! Sheesh, I could have downed a lot more, but I was quite buzzed as it was, so 2 glasses seems to be my limit. I'm glad that I took the subway home. ;)


There's Karen!

Let me point out a couple posts. Amy, of Sew Well, wrote the greatest post about last night. I borrowed her pictures for my post as I did not take any. (There were many people snapping pictures, but many of them don't blog.) She even lives relatively close to me! Amy, if you need help pinning a hem, let me know. :)

Karen, our guest of honor, wrote the greatest post about the sale last Monday at Britex. I don't usually attend these sales, but she is not exaggerating about the mob. I find that, even at the sales, their prices are quite high. But I'm pretty sure I recognize a local sewing friend, Wendy, in one of her pictures. :)

New haircut!

Sunday, May 6, 2012

Style Arc Jilly Red Twill "Jeans"


I guess I fell prey to the spring trends! A couple weeks ago, I decided that I really needed red jeans. I must have red jeans!

I mentioned this to Margy, who immediately replied that she had some red stretch twill that wasn't her shade of red and would I be interested.

Would I? You betcha!

What arrived on my doorstep a week later was 3 yards of Italian cotton lycra twill in the yummiest color. It was even pre-washed! And gorgeous. I then had to decide which pattern to use:

  • The famous Jalie Jeans. I have made this pattern twice, once in blue denim and once in cream corduroy. I proceeded to wear the blue denim pair for 3 days and decided, pretty quickly, that I did not want to use this pattern.
  • The famous funky Au Bonheur jeans. I decided, very quickly, that though these fit me well, I wanted a more conventional pattern for my red jeans.
  • The Style Arc Jilly Jean. I've had this pattern in my stash for awhile. I decided it was time to try it out.

I wanted a skinny leg for this pair of pants. Even though the skinny jean look might be contraindicated for my figure, that's what I wanted. :)

The Jilly Jean doesn't look like a skinny jean if you look at the illustrations. Checking the few reviews on Pattern Review supported that suspicion - it has a very straight leg. I knew I would have to do some fitting at the lower leg.


A nice, rich, true red.

Alterations and Modifications:

  • I made a size 10, my usual Style Arc size. (They are SO consistent in their sizing!)
  • Cut off 3-3/4" from the hem. Style Arc designs for a much taller woman. :)
  • The leg on the pattern is very straight. I removed 1-1/8" from the inseam and the side seam at the ankle (after shortening), tapering to nothing at the knee. This removed 4-1/2" total from the ankle, resulting in the much closer fit that I wanted.
  • Widened the waist a bit. Mostly straightened out the curve on the back, front yoke, front pockets, etc.
  • This pattern comes with both a rectangular and a contoured waistband. I used the rectangular waistband, though I used a longer rectangle than they provided. I cut it on the cross grain so it would be stretchy. I then inserted elastic into the finished waistband so that these, unlike my Jalie denim jeans, will stay up.
  • Instead of using a zipper fly, I wanted a mock fly. I like the look of a fly on my jeans, but not an actual fly. Once again, I used Debbie Cook's Fly Front Tutorial, eliminating the zipper.
  • The pattern is designed with a sewn-on fly. I prefer a cut-on fly. I sewed it on, as designed, but when I make this again I will cut the fly on.
  • I didn't quite understand how to use the pattern piece that was provided for the pocket bag. Rather than try to puzzle it out, I drafted my own pocket bag and facing. I used a contrast cotton print for the pocket facing and bag.
  • Up top is the pocket bag that comes with the pattern. Below are the pocket bag and facing that I drew up.
  • I didn't bother to install rivets. I have all the rivets and tools, but I just can't be bothered.

Early top-stitching trials.
It takes practice to get a clean corner using the triple stitch. The secret (at least on my machine) is to turn the corner after the 2nd forward stitch. My machine goes forward 4 times, then backwards 2 times.

Topstitching:

My next decision was about the top-stitching. Do I use cream/white thread? Red thread? Top-stitching thread? Regular thread? Once again, it was Margy to the rescue. She mentioned the triple stitch, available on most sewing machines, as great for top-stitching. Even my ancient Bernina 930 has this stitch, though the last time I tried to use it, about a year ago, it didn't work. But now that my machine has been serviced and is running like new, I decided to try it. It worked great! What's more, you use it with regular thread, meaning I didn't need to run to the fabric store for top-stitching thread. I decided to go with matching red thread.

I had to spend some time practicing the stitch. On my machine, it goes forward 4 stitches, and then back 2, then forward 4, and back 2, and so on. I was having trouble figuring out when to turn a corner cleanly. Again, Margy had advice. What worked is to turn a corner on the second stitch, going forward. Try it!

Conclusion:

I love my red jeans!

I do wish the front rise was a scosche higher — it hits me at the fullest part of my tummy, not a great place. But of course my tops will cover that up.

I definitely want more of these! Maybe a lime green pair! Maybe a black pair. But I will wear these for awhile to determine if I need more fitting tweaks.