Friday, December 28, 2012

Happy New Year!


I hope everyone is enjoying the end of year holiday season! I am, as is my norm, having my sewcation. I have been working hard on an involved jacket and having a blast. I hope to finish it soon so I can move on to other things.

I had so many people ask me, via email or forums, if my kids liked their outfits. They did seem to! We did our gift exchange rather late on Christmas Eve, after a big meal. At that point no one, including me, wanted to mark or finish the skirts. I haven't seen the girls since Christmas Eve, so the skirts aren't yet done.

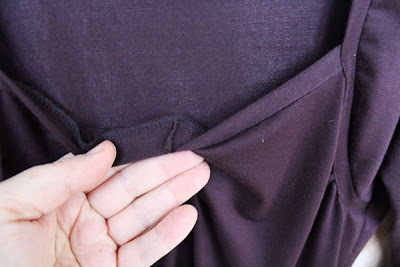
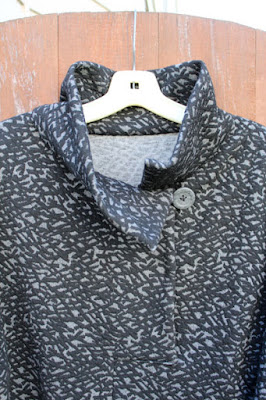
But last night, DD1 went to see San Francisco Ballet's Nutcracker and she wore the top and she loved it. She texted me a couple (dark) pictures (one shown above) from the Opera House and it does seem to fit well. She goes back to university in a week or so, so we definitely need to get together and finish the skirt before then. DD2 has been working like crazy over break, so I don't know when she and I will be getting together.

The week between Christmas and New Years is rather sacred to me, sewing wise. It's a time to tackle involved, or fun, projects. I leave the house as little as possible and don't encourage any sort of outings. However, I do have one little tradition, which is to go to Stone Mountain and Daughter on the morning of New Years Eve. If you are around and head over, maybe I'll see you there. :) I need some buttons for my new jacket and some black thread. There are no special sales that I know of, but it's just a nice quiet day to cross the bridge and see a great store that I rarely visit in person.

I have been enjoying the end of year summaries that many bloggers post, but I don't like to spend this week doing much blogging. Writing blog posts, if you haven't done it, takes a long time, at least the way I do it. So you will see my "end of year" summary posts on my blogiversary in August.

I have to admit, I am so happy and contented that I told Margy today that it's probably a good thing I am alone or I would probably drive anyone else nuts with my cheerfulness. I am so grateful that I have a hobby that I love, that brings so many other wonderful people into my life, and satisfies a deep place in my soul.

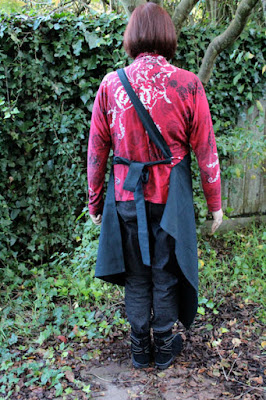
I hope each of you has a Happy New Years! I am including a little sneak peek of my next project, which is a crappy cell phone pic, so the color is a bit off.

Sunday, December 23, 2012

Christmas Sewing


I don't usually sew Christmas gifts. I often will knit Christmas gifts, but that didn't happen this year, for a variety of reasons. Several days ago I was evaluating the gifts I'd purchased for my daughters for Christmas and I realized it was scant offerings this year, especially considering that I didn't knit any hats, scarves, or wrist warmers.

So, at the last minute, I decided to sew something. I rarely sew for my daughters. Probably the biggest reason is to avoid frustration. They are both very choosy about style, fit, pattern, and color. Particularly about fit. It's just easier to buy them clothing or, better yet, let them buy their own.

But I decided to bite the bullet and hope for the best. I spent a lot of time anxiously considering various options. I wanted to use stash and/or remnants for everything. I measured each of them when they visited on separate occasions. (I know they are expecting jammies this year, so I hope they won't be disappointed.)

I was very surprised that the girls (at 20 and almost-18 years old) have virtually identical measurements, though the oldest is 2 inches taller. Yay! That was very considerate of them.

I poured through my small pile of Burda pattern magazines. I scoured my stash for multi-sized patterns that might accommodate them, but still be youthful and current. (Even if my girls shared my aesthetic, which they don't, most of my patterns are in a range that is too large for them.)

I wanted the outfits to believably mimic RTW and be coordinated - no point in sewing fashion orphans. I poured through various RTW websites intended for the young, such as Delias, Urban Outfitters, and Zara, to make sure I wasn't off base in my ideas.

In the end, I decided on a wrap skirt (#128) from the Sept 1994 issue of Burda (size 38) and a Jalie Sweetheart Top (size S). For the two skirts, I had some stretch denim remnants from my recent spate of skinny pants sewing, though I really had to work it to get the skirt out of the tiny piece of blue flocked fabric and ended up piecing the waistband. In my stash, I had some nice viscose/lycra (in black) and rayon/lycra (in eggplant) - each fabric coordinates with one of the skirts.

I made the skirts on Thursday and Friday evenings, after work. I made the two tops on Saturday. What quick, satisfying sewing! (So this is what it's like to just sew right from the envelope!) From my stash I had snaps (I love to use my SnapSetter tool) and closures for the skirts. I had tried sewing the black denim skirt with contrast gold top-stitching, but didn't like the result and spent an hour ripping it out.

Amusing aside: I had one small spool of eggplant thread in my stash. I'm sure this old style Dual Duty spool was from my mother's cache. I neglected to notice as I was winding the bobbin that it used up almost the entire spool. Not wanting to head to the fabric store two days before Christmas for a spool of thread, I sewed most of the top using a "close enough" brown thread in the needle and saved the eggplant thread for where it would show, such as the hems, top-stitching, and attaching the bust elastic. I have more of the eggplant fabric, so I'd better buy more of this color!

We celebrate our Christmas on the 24th, so I am crossing my fingers that these outfits will fit and they will like them! (Though, in full disclosure, I only attached the snaps and skirt closures to the right side of the skirts. This way I can have them put them on, mark the correct positions, and quickly attach the other halves.)

I was happy with both patterns and think that the Jalie top is especially cute. It's a bit fussier to sew, with it's 1/4" seam allowances and small pattern pieces, than a normal tee, especially with these flimsy non-stable knits, but is not too bad.

The only change I made on the Jalie pattern was to the little band on the front. Because of the vertical elastic, the band on top flopped a bit, so I sewed out a small wedge of fabric so it would lie flat. The photos show what it looks like:

For the skirt, I omitted the pocket and contrast top-stitching.

I hope you have a nice Christmas, if you celebrate. For me, I have the week off between Christmas and New Years. My sewcation begins on Dec 25th as the kids spend the day with the other side of the family.

Ready, set, SEW!

Tuesday, December 18, 2012

Style Arc Grace Coat


It was 45°F when I took these pics. Perfect weather for a snuggly coat!

I decided that I wanted a new winter coat. I started with the Style Arc Grace coat, which was released last month, but I made a number of changes. For supplies, I shopped my stash. Because I didn't have enough fabric for the coat, I used another fabric for the facings. Ditto for the inside - I used two lining fabrics. Most of the fabrics came from Fabric Mart, except for the wild lining, which I found at Fabrix a couple years ago. This was a very engaging project, with lots of hand sewing. It kept me busy for awhile.

Supplies:

  • A Bensoni wool blend from FabricMart. This black and cream fabric has a weave and drape similar to a handwoven - the cream threads have loft. It is reversible, more black on one side and more cream on the other. I used both sides. The black threads are wool, the cream threads are not - they feel like a soft short staple cotton. I had only 3 yards, which is not enough, so I had to make some accommodations.
  • Black wool coating, from FabricMart. I didn't have enough of the Bensoni wool for the facings, so I used a solid black wool. At the end, I had only a small piece of the Bensoni wool left.
  • Black silk charmeuse lining backed with interfacing, also from FabricMart. Because it is backed with interfacing, it is extremely easy to cut and sew. I didn't have enough to line the entire coat, so I used it for the pocket and sleeve linings.
  • Black and cream poly charmeuse from Fabrix. I didn't have enough to line the entire coat, so I used it in the body of the coat, but not the sleeves.
  • Knit tricot fusible interfacing for the facings.
  • 2 toggle-style clasps.
  • 1" shoulder pads.
One of the two lining fabrics. Also, the contrasting solid black wool used for the facings.

Alterations and modifications:

  • FBA, adding length only. (There was enough width.)
  • Extended the closure to be asymmetric.
  • Swapped out the collar.
  • Did not want to use bindings, so added conventional hems.
  • Drafted linings and re-drafted the front facing to accommodate the asymmetric closure.
  • Converted welt pockets with flaps to curved welt pockets at the side seams. I used the curved welt pocket from the Style Arc Jacqui coat, and drafted a curved welt to replace the knit ribbing.
  • Narrowed the shoulders by 3/4". This coat is designed to be off the shoulder, but I always have to narrow the shoulder of a Style Arc pattern by 3/4", so this alteration means that the shoulders fit as the designer intended.
  • Because I was short on yardage, I shortened the jacket by 2-1/2".
  • Omitted the sleeve cuff, but intentionally left the sleeves long so I could fold them back. In fact, I lengthened the sleeves by 1-1/4", but in retrospect this was a bit too much. Drafted a sleeve facing to accommodate the fold back cuffs.
  • Instead of buttons, used two toggle-style clasps.
  • The pattern did not call for them, but I used a pair of 1" shoulder pads.
  • Used a double thickness of the selvedge to trim the right side of the coat.
The altered front pattern piece.

Details:

Asymmetric Collar

I really liked the collar used on the Vogue 8854 tunic that I made recently, so I made the coat asymmetric and drafted a similar collar.

Curved Darts

When I did the FBA, I added in length only, as there was enough width in the loose fitting coat. When I went to sew the dart, which I had placed in the side seam, I realized that sewing a straight dart would be problematic because it would end up too close to the armscye. So I sewed a curved dart. This was easy to do in this loosely woven, very malleable wool. I am very happy with this dart.

Curved Welt Pockets

Because of the curved front hem and the curved darts, I decided I wanted this coat to have curved welt pockets. I borrowed the curved welt pocket from another great Style Arc pattern, the Jacqui Sweater Coat. You can see the process I used to make those pockets here.

For the Jacqui coat, the welt was made from a rectangular piece of ribbed wool knit. For this version, I drafted a curved welt. Because the fabric is so thick, I used the lining on the back side of the welt.

Selvedge Trim

This fabric had a beautiful selvedge, so I harvested it. I layered one strip of selvedge on top of another with a slight offset - about 1/4", sewed them together, and used the resulting double selvedge as a trim for the right front of the coat and the hems of the sleeves.

Closeup of curved welt pocket, selvedge trim, and toggle clasp

Toggle Closures

As previously blogged, instead of buttons or snaps, I used two toggle-style clasps. I thought I would have to use snaps in addition to the clasps, but I found they were not needed.

Conclusion

This coat is absolutely wonderful to wear. It is loose enough and the armholes are wide enough to fit over most any garment. I love the changes I made to the collar - there are many ways I can wear it. It's a beautifully drafted pattern. It feels completely luxurious to wear and I can already tell that this will become my go-to winter coat.

Another thing I wanted to mention. I don't know if you follow Merche's blog, Aventuras de Costuras, but you should! She lives in Spain and posts in Spanish and English. I found her blog some time ago and she makes the most gorgeous clothing for herself and her children. She used my Cocoon Sweater instructions and posted (with permission) her own version, in Spanish and using metric measurements. She really rocks this design - check it out!

More Pictures

This is me, dressed for my eye appointment today. I am wearing my Style Arc Cassie pants, which I really love, and a black Sewing Workshop Salsa top, which you can't see.
Collar worn up

Friday, December 14, 2012

It's FUN to Make Holes!


I'm not big on process posts, but you have probably noticed that. By that I mean, I take you along as I work on the project, from pattern and fabric choice, through fitting, through the various stages of the project, until the unveiling at the end.

The idea of process posts makes me nervous. Maybe I have a commitment phobia (it's entirely possible) but I change my mind all.the.time. I change my mind about what I'm going to make, both the fabric and the pattern. I have Hamlet-like indecision. I change things constantly as I work. I do not have a full vision of the completed project - it changes as I go and I can be just as surprised as anyone.

Do you like process posts? Or can you take or leave them?

Having said that, here is sort of a process post. I have been working on a coat using stash materials. (For fiscal reasons I will be mostly sewing from stash for awhile. Given the depth of my stash, I have nothing to complain about!)

However, I was in Stone Mountain recently and I bought a couple toggle closures. I love me some good hardware and these were very cool. They feature metal clasps (they came in black, silver, or gold colored metal and I also saw them at Britex the other day).

They have leather pieces that you attach to the garment, as you would expect in a toggle closure. The leather is thick-ish and very stiff. I'm sure you could put it through a sewing machine, but I didn't want to. Given the curve of the leather piece, it would be a challenge to make it look nice on a standard sewing machine, even with buttonhole thread.

It was an opportunity to use some leather working tools I have been wanting to use for a long time. (I just love me some tools.) I used a wing divider to lightly score a guide line along the edge of the leather. I then used the smallest hole on a mini hole punch and a wooden mallet, on a cutting board, to punch holes into the leather.

Punching the holes is so.much.fun. All of the aggressions, if you have any, just go away. I was sorry I didn't have more holes to punch, though my work table was littered with tiny little leather dots afterward.

I attached the leather to the coat using size 8 pearl cotton, purchased at Britex, and a large-eyed needle. I double sewed - each stitch has 2 threads.

Easy peasy!

This coat has some other interesting details that I've added, so maybe I'll do another post or two, if you like.

By the way, I want to give a shout out to a couple of really neat women I met recently! I was in Fabrix a week or so ago when a woman introduced herself as a follower of my blog. Well, we hit it off and I ended up goading her into buying (a lot) more fabric, then driving her to a UPS store to ship it home - she was visiting SF while her husband attended a conference. Then she treated me to lunch and we went to the Ribbonerie where she bought some beautiful ribbons. She also blamed me and Margy for her new Trippens. (Just call me The Enabler.) I really enjoyed meeting you and hanging for a bit, MaryAnne!

More recently I ran to the grocery store and a woman complemented me on my polka dot coat and unusual scarf. We struck up a conversation and are planning to get together for lunch. She's also a blogger who makes the most amazing mail art. (Yes, mail art! Beautifully collaged pieces! I did ask her to spell it, though, because for a moment I thought she was doing some sort of art on males.) It was nice to meet you, Pamela!

Saturday, December 8, 2012

Cocoon Sweater and Proportion Proportion Proportion


A shortcut to Proportion Proportion Proportion.

Last night I attended an annual party featuring the greedy gift grab game. This year I decided to make a cocoon sweater.

A cocoon sweater is super easy to make - it only requires 48", or 1-1/3 yd, of a knit fabric. You can use any knit, so long as it has a nice drape. I used a periwinkle blue sweater knit. I used the full width of the fabric, from selvedge to selvedge, which is about 62". A narrower fabric results in shorter sleeves, and also works quite well.

The following diagram shows how this is constructed.

With the fabric folded "the short way", the piece is cut to 24" long, which happens to (conveniently) be the length of my Olfa ruler. The cut edge becomes both the hem and the neckline.

Sew the side seams, leaving about 10" unsewn down from the folded edge. These openings become the armholes.

Finish the seams, hem, edges, as you like. In my case, I sewed the seams by hand and finished all edges, including the selvedges, by turning the under twice and hand stitching. The stitches were pretty much lost in the lofty knit.

That's it. Voila. Fini.

I also attached an antiqued kilt pin that I purchased on Etsy - the recipient can use it to hold the sweater closed.

I always angst about wrapping the gift as I am quite gift-wrap impaired. Then, yesterday, Rhonda Buss posted a fortuitous post on how to make tissue paper flowers to decorate a gift box.

I raided my pattern box for a pattern I had made that was a wadder. The instructions became the wrapping paper and the pattern tissue became the bow. The ribbon came from a huge roll of cotton twill tape. I don't think I made the bow correctly, but it worked well enough. Thanks for this cute idea, Rhonda!

Here is the same garment in a black slinky.

Now, what did I receive in this game? I received a Sewing Workshop Tamari apron made by Rita. I have always wanted to make one of these aprons, but wasn't sure if it would work on my shape.

I LOVE it!!

Proportion Proportion Proportion

I had fun getting dressed for the event last night.

After much thought, I decided to wear a duster I purchased a long time ago, which is made from a combination of black organza and a black cotton jersey knit. I wore it over a black t-shirt and my black Au Bonheir capri length pants that I often wear for evening events. For some color I added a short scarf with red fur flowers. The outfit was completed with my black Trippen boots.

I thought it looked quite cute in the mirror.

I took a few quick pictures and realized that the outfit wasn't quite working. One of the best pieces of advice I can give is to take pictures of yourself in an outfit.


Looking at a photo shows proportion in a way that you just can't see in a mirror.

I quickly swapped out the pants for a slim legged pant. I couldn't find my Katherine Tilton black skinny pant that I made recently (it's probably hiding in the laundry), so I wore my Style Arc heathered grey Cassie pant. I also swapped out the short scarf for a long red scarf that I purchased last August at the ACC Craft Fair. I have worn this scarf more than anything else I've bought in the last year.

I took a few more pictures and could see that this version of the outfit worked much better.

If I could convince sewists to do just one thing, it would be to make use of a camera, remote with 2-second timer, and tripod. Even if you don't share them anywhere, you will learn *so* much from the exercise. I find it's much better to take my own photos because I'm less self conscious and can take as many as I need. I can then upload them to my laptop to get a closer look. Sometimes I will notice something is off - is that tree growing out of my head? I can then re-take them with no one growling about the inconvenience.

Since I starting taking pictures of myself wearing my clothing, I have completely changed what I sew for myself and how I fit it. Looking in the mirror just does not convey the same information about proportion.

I'm still working on my coat. Unfortunately, I've hit a snag and have to see what I can do to remediate the situation.

I hope you all have a nice weekend!

Sunday, December 2, 2012

Vogue 8854 - Two Tunics


This is another pattern that came out in the last batch of Vogues and I thought it had potential. Now that I have made it twice, I can say I love this pattern. I'm sure I will be making it many more times in future.

But I'm getting ahead of myself.

This pullover tunic has an asymmetric opening and a simple collar that can be worn up, folded down, or half up and half down. As designed, it features snaps that extend into the collar, but I left those off as I will wear the collar with one or both sides folded down. There is a view with a hood but, while I like the look of a hood, I don't really like wearing a hood, at least not on a top. It tends to pull and I'm constantly readjusting my garment.

The fabric for the first version, the polka dotted tunic, has been aging in my stash a year or two and is from Fashion Fabrics Club, I think. The black and grey fabric from the second version, from Emma One Sock, is a poly/rayon/lycra and is wonderfully lofty and super soft. Margy recently used the same fabric to make a tunic. This was one of those times we discovered we both bought the same fabric after the fact.

I used a scrap of black rayon lycra jersey to make the button loops for both versions. The button for the polka dot top came from grandma's button box (I had to cut the ancient threads off) and the button for the second top is from Stone Mountain & Daughter. Finally, each top uses one jumbo snap on the placket. I did not use the 3 or 4 snaps recommended by the pattern. The pocket for the polka dot version used another remnant of black rayon lycra jersey. The pocket for the black and grey version used a remnant of a black woven lining. Basically, I grabbed what was at hand.

Alterations:

  • I started with a size large (16-18). It has a finished bust measurement of 47", so I did an FBA to add a couple inches in width and 1.5" in length.
  • Both fabrics are 2-way stretch with minimal vertical stretch, so I sewed in the darts.
  • Tapered the hips down, which is typical.
  • Narrowed the shoulder by 1.5". Fairly typical.
  • Shortened the sleeves on the first one by 2". It was still a bit long, so I shortened the second one by 2-1/2". This is more than normal for me, so the sleeves run long.
  • During construction, I tapered the waist on the polka dot version by 1/2" (2" total). When making the second one, I accidentally tapered the waist in by 1" (4" total). At first I thought it was a huge blunder, but I rather like the effect.
  • Omitted the front patch pocket and, instead, used a side seam pocket.
  • Omitted the vertical top stitching on the placket that extends into the collar.

The pattern sews together pretty easily. The most fussy part, for me, were the side seams, as I first have to position and sew the dart, then taper the waist, then add the inseam pocket, which I quickly drew out on a piece of printer paper.

I am wearing my new Katherine Tilton skinny pant in these pics. I am loving all of my new skinny pants, which are super comfy.

I've started my next garment, which is a coat. We've had lots of rain the last few days and it's been on the chilly side. It will be nice to sew a garment where I'm not half naked most of the time. I've been enjoying the rain as I have a big pot of soup, and am well stocked with tea and cocoa. Add in a good sewing project and no reason to leave the house = a perfect weekend! I hope yours has been equally serene.

And now, the pics.

Collar half up.
Collar folded down
The fabric is washed out in this pic.