
First, thanks to all of you for your enthusiastic feedback on the Tablecloth Skirt. Marec (on Pattern Review) suggested a sew-along. I've never even participated in a sew along, but I'll consider running one in the new year if there is enough interest.
I have very little time to sew in the next couple of weeks, between work, kids, cooking, and visitors. In fact, I'm busy tomorrow (Sunday), so I decided that today I needed a quick project I could complete in one day. But which easy project to choose?
Several weeks ago I decided that I wanted to make a Style Arc pattern I had purchased last June, the Seaside Sue top.
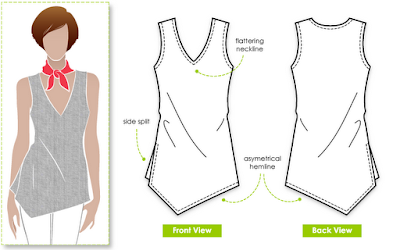
Seaside Sue Top
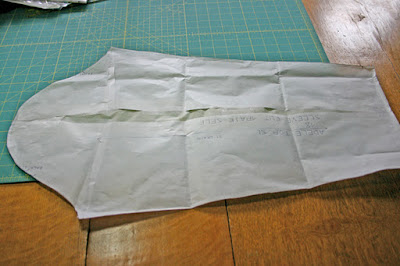
I was planning to make some changes, namely to raise the neckline and to add sleeves. When I pulled the pattern out to work on it, I saw that they had accidentally sent me the wrong size, it was a size 10 rather than an 18. I emailed Style Arc about the error, asking for the correct size. In my email, I told them I was planning to add sleeves to "winterize" it. (I've teased Chloe in the past, asking her, what have you got against sleeves? Since then, she has been releasing more sleeved top patterns.)
They quickly responded to my email and told me that the free November pattern was a sleeved version of Seaside Sue and that they would send it to me in another week when it was available, if I preferred. You betcha!

Adele Top
(It's not the first time I've asked them for something that was already in the works. Get out of my head, Chloe!)
Materials:
- Green print rayon lycra jersey from Fabrix.
- Black viscose spandex "Annabelle" jersey for contrasting neckband from Vogue Fabrics.
- Twill tape to stabilize shoulder seams.
- 1/2" Steam-a-Seam Lite 2 to stabilize hems.
Alterations and Modifications:
- The finished bust measurement of the size 18 is approx 44". My bust is closer to 50" but this is a stretchy fabric. I held 22" of the fabric against my bust and decided that I didn't need to add width. This top is more flattering if it gently hugs the bust anyway, so I decided that the negative ease worked for me. But I didn't want the top to "ride up" in front, so I sliced the pattern at the bustline (front only) and added 1" horizontally. I did not alter the back because I just eased the extra 1" in at the side seam.

- The sleeve was a bit narrow, so I widened it by approx 1-1/4".
- The sleeve is too long - I shortened it by 1-1/2".
- The pattern instructs you to interface the neckline. The contrast neckband is optional. If you left that off, you would need to interface/stabilize the neckline somehow. I left it off and used the contrast fabric, which functions as a ribbing.
- I hemmed the top and the sleeves using Steam-a-Seam Lite 2.
- I did NOT have to narrow the shoulders!!! What the heck??? I *always* have to narrow the shoulders! Always! On the "Big 4" I often narrow the shoulders a full 2", but even on Style Arc I have to generally narrow them 3/4"-1".
- I did not modify the neckline. If you notice, it's higher than is shown on the drawing. Thanks to Sigrid for asking this question. :)
Conclusion:
Wow, do I LOVE this top!!! I LOVE the easy FBA! In fact, I think I want to revisit the funnel-neck tee and try this FBA instead of the other FBA I used.
I can easily see straightening the side seams and chopping the hem, making it a standard horizontal hem, to make this my go-to standard tee. It fits that well. LOVE LOVE LOVE.
More pictures


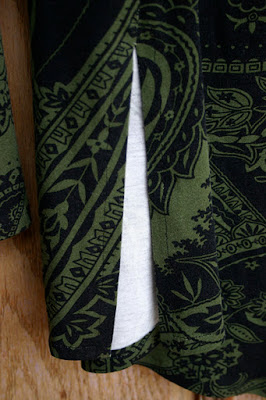
Closeup of side slit