Year ago I inherited a nice, sturdy ironing board from my mother. It used to have one of those nasty Teflon covers, sold by so many sewing supply places. I hated that cover, and then, during the years I was not using the ironing board, it was exposed to moisture and something metallic rusted all over it. It was a nasty mess and I threw the cover and padding away. I was left with a very nekkid ironing board.
For the last six months or so that I've been sewing again, I just threw a piece of wool yardage over the ironing board and ironed away. It wasn't very satisfactory, not thick enough, and was always shifting around, but I made it work.
For the last couple weeks, I have been preparing for an upcoming sewing retreat, and I decided it was high time I made a proper cover. Years ago I had a wool army blanket intended for a ironing board pad, but it was lost to the mists of time. (An old wool blanket makes a perfect pad! So, check army surplus stores, flea markets, your basement... Just toss it in the washer/dryer and it's ready to cut out.)
To create the pattern, I took my ironing board, placed it on the floor, upside down, and traced the shape onto paper. I used that shape to cut out five layers of wool – three from the green wool twill I had been using as an ad hoc cover, and two layers from a piece of wool I fulled in the washer. The resulting yardage was very thick and very pink. (Yes, the original yardage was pink, but it seemed even more pink, if that were possible.)
I layered those five pieces together and pad stitched the heck out of them. Not so tightly as to compress the loft, but very thoroughly so they won't be shifting. I then loosely whip stitched around the entire piece. Voila, an ironing board pad that will hold heat, but not get too hot.
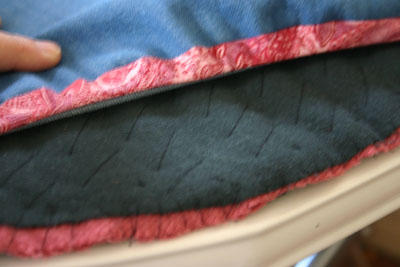
The pad, consisting of 5 layers of wool, pad-stitched together, with the raw edges loosely whipped. Yeah, it's ugly, but who cares? No one will ever see it. ;)
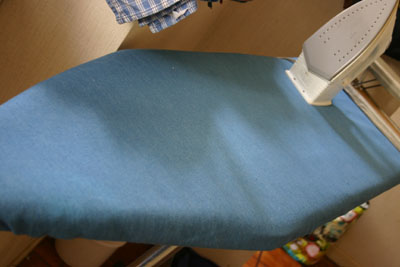
I cut the cover itself out of a fairly heavyweight piece of denim that was lying around. It's a light-colored denim, so I wouldn't be using it for clothing, as I prefer the darker blues. I laid the pattern on the denim, added 3" all around, and cut it out.
Next, I found a half yard of a pretty quilting fabric, mauve with a paisley design, and I cut 4 or 5 bias strips, 1.5" wide. I joined them together to make a continuous length. This would form the casing for the elastic. I folded it, wrong sides together, and stitched it around the cover with a 1/4" seam allowance. I zigzagged over the raw edge, but you could serge it as well. At the beginning and ending of the casing, I just turned the raw edges under twice, and topstitched (before attaching to the cover).

Attaching the bias binding, folded wrong sides together, to the cover. I then zigzagged the raw edges.
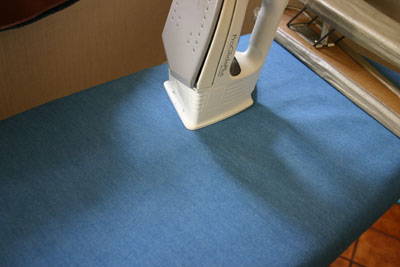
I threaded a narrow elastic through the casing, placed the cover on the ironing board, and pulled tight! I tied the ends of the elastic in a big bow and tucked them out of the way.
Wow, I LOVE my new ironing board cover! It has the perfect amount of loft and it's hecka sturdy, not to mention it's a very pretty shade of blue. I'm now ready for the sewing retreat!