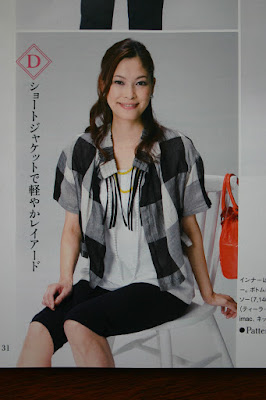
I mentioned in my blog entry on creating a
cascading ruffle that Rachel was coveting a certain Anthropologie skirt, but at $158, her pocketbook, not so much. (And, boy do I hear that!)
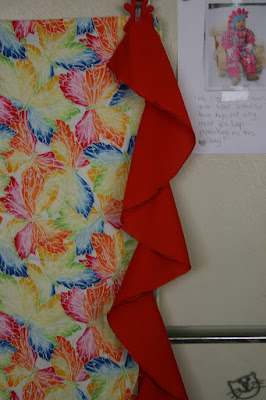
The front:

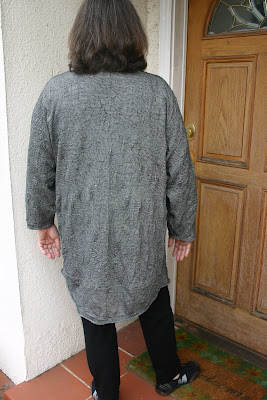
The back:

Another front view:
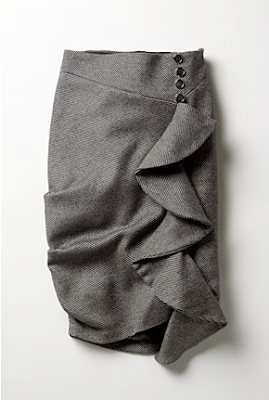
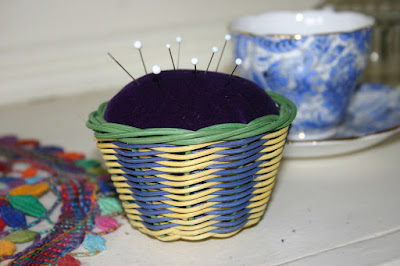
With optional accessory:

OK, I think to myself, maybe if DD1 would like this skirt, I could draft it for her and then share the technique with other interested folk. So, I showed it to DD1 who promptly said "eww" or something very nearly like.
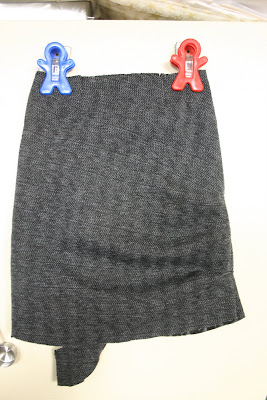
So, I abandoned that idea. But I pretty quickly decided, what the heck, why not draft it up in a small scale. I enjoy challenges like this. :)
So, here is my small scale version of the skirt. What do you think? Close enough? I think it's not too shabby for a first draft.

And here's the back
Here's how I did it.
First, you need an A-line skirt pattern that fits you. It can have one dart or two darts, or whatever. It doesn't really matter.
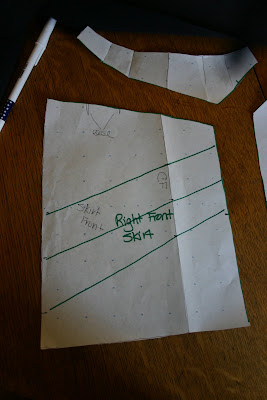
1. Trace off the skirt front and back. Trace it onto paper, eliminating those pesky seam allowances and trace both halves, so you have an entire front on one piece of paper, and an entire back on another. This is necessary because it is an asymmetric pattern so you have to draft the full front and the full back.
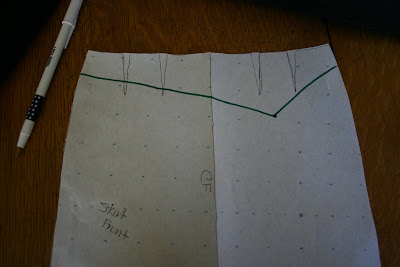
2. Next, draw in the style lines. In this case, we have a yoke that comes to a point somewhere between CF (center front) and the S/S (side seam). Your yoke seam may cut through a dart or two. It's easiest if the yoke's seam line intersects the bottom of the dart, but if that isn't possible, so be it. We will deal with that later. Then draw a line straight down to the hem from that point, parallel to the CF. (The location of your yoke point, the depth of the yoke, it's all up to you. Hold the pattern to your body and decide where you want it. This is why we draft patterns
and sew in our underwear. :) )

3. We now have three pattern pieces: the front yoke, left front, and right front. Make a couple little marks where you might put a notch, so you can line up the pieces later when sewing. Cut the pattern apart on these lines. The left front is the narrow strip. That piece is pretty much done. Set it aside.

Now, before proceeding we need to talk a bit about yokes. Yokes are wonderful things. They help you achieve a nice smooth fit over an area that might otherwise have darts, like the top of a shirt or a skirt. One can remove darts by using a yoke and transfer that shaping in one of two ways: You can either shift a dart to a seam or you can convert it to flare (as in extra fabric at the hem). You may notice that my yoke cut across two darts on the left side, hit the point of the fourth dart, and was below the third dart. We will deal with that in a moment.
4. Next remove the darts from the yoke. Just remove them. For the two on the left, I folded them out, just as if they had been sewn. For the fourth dart, which ended right on the seam line, I did the same (though I actually cut one leg of the dart, overlapped to the other leg, and taped, but it's the same effect). That leaves the final (third) dart which ends just a bit inside the yoke. Well, if this ended further within the yoke, I would have to convert it to flare, but since it is close to the seam, I treat it the same as the others and cut the leg of the dart
as if it ended at the bottom of the yoke. In order words, I am fudging it a bit. :)

5. The yoke is now done, except the pattern line needs to be smoothed out a tiny bit where the darts used to be. French curves are good for this, but since I don't know where my French curve is, I wing it. :)
6. That leaves the right skirt piece. First, there is the issue of the darts that were lopped off in the middle of the yoke. There are a few ways to handle this. First, the tiny remaining darts could be sewn up. Yuck. The second approach is to slash the pattern from the bottom of the dart, down to the hem, close the remaining dart, thereby opening fullness (flare) at the hem. I don't want this pencil skirt to have additional flare at the hem so I resort to option #3: ease. When I sew the yoke to this piece, I will ease in the additional fullness right where that dart would otherwise be. Ease is your friend. :)
OK, this leaves the last, but crucial, detail of this skirt. The three pleats on the right side seam. Those pleats look about and inch deep to me, meaning each requires 2 inches of fabric. If you just were to take up those pleats, without modifying the pattern, that side of the skirt would be six inches shorter than the right (because 3 pleats times two inches each = 6 inches). This does not appear to be the case, so you have to add length to that side of the pattern. But you can't just add length to the bottom of the skirt. Well, you could, but they didn't do that in the Anthropologie skirt. How do I know that? By looking at the drape. Pay attention to the drape. The pleats drape diagonally up to the left side of the skirt. Very pretty and it's no happy accident - it's built into the pattern draft.
Note: The next step involves cutting up the right front pattern piece. Before you do this, TRACE off a copy of the right front. You will use this later for your lining.
7. It is time to take the right front piece and slash and spread it. First, locate where you want those pleats to be. If I were sewing this for myself, I would be at the mirror, marking where I want the pleat to start and noting in which direction I want the drape to go. Study the original carefully and you can pretty much see how it works. Since I am making a small-scale demo, I just eyeballed the inspiration skirt and marked it on the pattern. Draw your three lines in and extend them the opposite edge of the pattern. (Note that the direction of the slashes is CRUCIAL. Do not think it doesn't matter. It does.)
8. Cut on each of those lines all the way to, but not through, the other edge. Leave a little "hinge" of paper - don't completely detach the pieces.
9. Lay the butchered pattern on another piece of clean paper. Decide how wide you want your pleats to be. If you want a 1" pleat (which looks about right to me) spread the pattern 2" wide. Repeat for each of the three slashes. When satisfied, tape it down.

10. Next, you need to smooth out the side seam. Again, a French curve helps, but I just eyeball it. In fact, smooth out both sides, because the other side is looking a bit funny too, where those "hinges" are. But take a very light hand with this, you are ever so slightly smoothing it out, a heavy hand here can change the drape and the fit.
11. Now, it's time to take care of the skirt back. Again, it should be drawn on a piece of paper, the entire thing, not just up to the CB (center back). The only thing you need to do to the back is to repeat the slash and spread for the three pleats. Make sure that you mark each pleat location so that it is at the same location as it was on the front. This is important. Draw the slash lines in the same direction. Cut all the way to the side seam, leaving a hinge. Lay it on a larger piece of paper, spread the slashed pieces to the same width as you did for the front (2" or whatever). Spread, and tape.

12. This leaves the final pattern piece: the flounce. Measure the length of the seam from the yoke point to the hem. Follow the instructions
here to create the ruffle pattern. For my demo, that length was about 8" and a 2.5 inner circle was what I needed. The bottom of one of my favorite coffee cups was close enough.
Look carefully at the ruffle on the inspiration piece: I think it extends ever-so-slightly beyond the hem of the skirt. So, you want it a bit, just a bit longer than the hem. In my experience, it's almost impossible not to make it a bit longer. :) Make the ruffle nice and wide. The drama of this skirt is the ruffle and it should be nice and wide. Try 6" or maybe 8" on your muslin and see how it looks. For what it's worth, I think the flounce on my demo piece is too narrow.

The pattern draft is now complete. All you need to do is add seam allowances and a hem. For my demo, I just winged it and cut out the seam allowances on the fly, (I left off the hem), but do what you are most comfortable with.
Oh, I almost forgot. What to do about the grainline for the pieces that were slashed? Well, I kept the grainline the same in relation to the hem. So the hem was cut along the same grain that it was designed for. The rest of the piece went all wonky, but this is a Good Thing, because it assists the draping effect.


I used a fairly thick, fleecy knit fabric left over from another project. It's not a terrible choice for this skirt, but not what I would use for the real thing.
Here are my steps for assembling the skirt:
1. Stay stitch the ruffle. Clip the curves every half inch or so. Attach to the right front. (Note that on the real skirt, you would cut out TWO circles, with right sides together, stitch them along the outer edge, turn inside. But, heck, you could also serge the outer edge if you have a nice fabric with drape and weight to it. Also, the portion of the ruffle which extends beyond the hem will need to be finished on all 3 sides.) Also, when you stitch the ruffle to the skirt, attach it beginning 5/8" below the top so you don't catch the edge in the yoke seam.
2. Stitch the right front to the left front. Start from 5/8" below the top. In other words, leave the first 5/8" unsewn. Makes it much easier to sew the pivot when attaching the yoke.
3. Sew the yoke to the front skirt. Stitch the first bit, up to the pivot, cut the thread, pin the final bit, and sew that. The front is now completely assembled.
4. Sew the back darts.
5. Sew the right side seam. This is the seam with the pleats. Do not sew the left side seam yet.
6. Pinch up the fabric where you have marked the pleats. (You DID mark them, didn't you? :) Stitch from the outside to secure the pleat. I sewed about 1" across the side seam, so that was 1/2" before it cross the side seam and 1/2" after. Approximately. :) Do this for all three pleats.
7. Stitch up the left side seam. I sewed up the entire seam, but you might want to insert a zipper here. Just a thought. :)
8. The inspiration skirt was lined with a poly lining. No doubt you will want to line this to make it more comfortable and lovely. Just before step 7, I told you to make a copy of the right front skirt before slashing it. Use that piece, as well as the left front, yoke, and
original back pieces to cut out a lining. You may want to use the fashion fabric to line the yoke, and a silky for the rest of it. I leave that to you. :)
9. Sew on some non-functional, purely decorative buttons and call it a day.
Now, before you cut into your favorite fabric, please, please, make a muslin! If you don't like the pleat location, or depth, or whatever, that's when you want to find out. You can refine the pattern, or chuck it, and start over with your new found knowledge.
If, like me, you think this sort of thing is the Most Fun Ever, please find a local community college that teaches pattern drafting. Or buy a book and go from there. I am very rusty, very casual about my technique, but the skills I learned from my teacher (wish I could remember her name -- she had lots of industry experience) have been invaluable to me.
I hope you find this useful, Rachel. Go forth and sew. ;)